The first question you need to ask yourself is: Do I need to re-queen this hive and replace my queen bee? Here are some of the most common reasons for re-queening a hive:
Old queen. Your queen may be more than a year or two old. Some beekeepers routinely re-queen every September to be sure their queen is healthy, young and productive. Others prefer to let the bees do their thing and let the queen remain for two years or more. Most queens will only live for three to five years, and their egg laying will decrease over time.
No queen. If your queen is missing — verified by lack of eggs and/or larvae — you will need to re-queen the hive as soon as possible.
Poorly laying queen. If your queen is just not up to snuff, you may choose to replace her. This could be evidenced by a hive that should have more bees than it does, a spotty laying pattern or the advice of an experienced beekeeper.
Buy a New Queen
The first step in re-queening your hive is to buy a newly-mated queen bee. Contact your local beekeeping association to find a local queen, which is always the best choice. Sometimes, if you live in a rural area, that will mean having a queen transported to you from a honeybee supplier.
Remove the Old Queen
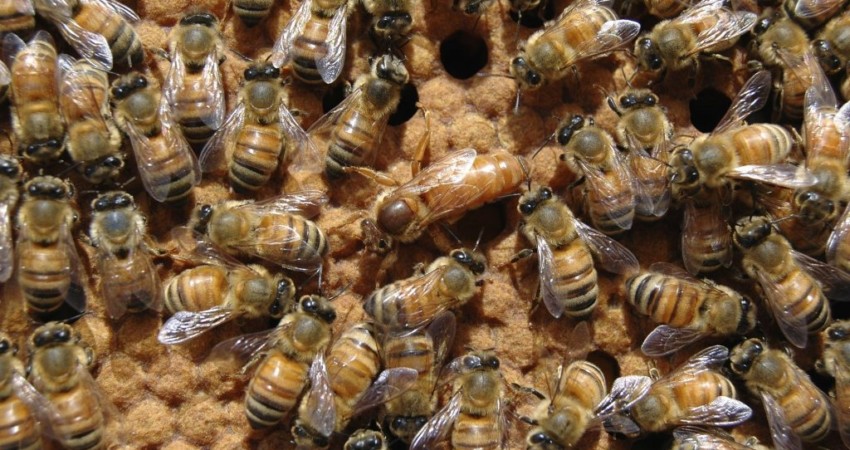
For this hive, there was a living but poorly laying queen bee who had to be removed from the beehive. Though you can keep her alive for a while in case the other queen doesn’t take or use her to split off another hive, most beekeepers kill queens that they remove.
If your queen isn’t marked, look for the circle of workers that surround the queen. She won’t be striped like the other bees, and she will be slightly longer and thinner in the abdomen.
Install the new queen bee in the hive. Begin by opening the beehive just like you would for a routine inspection (although you might want to go light on the smoke). Some beekeepers use sugar syrup and essential oils to mask the new pheromone smell of the queen in hopes that this will improve acceptance of the new queen by the bees. The choice is up to you.
If possible, it’s recommended to wait 24 hours between removing the old queen and installing the new one. This gives the bees more chance of accepting the new queen.
Now comes the fun part. It’s time to put the new queen bee in her cage in the beehive. Of course like almost everything with beekeeping, there are different approaches to this. Some leave the plug or cap on the end of the queen cage for one to two days, simply introducing the queen to the bees. There is some risk of the bees killing her if they reject her, so the idea is that by getting the hive used to the new queen, they will be less likely to reject her.
After installing the new queen bee, leave the hive alone for about a week. One exception: If you left the cork, plug or cap on the cage, open the hive up in one to two days and remove it. Then leave them alone for a week. This way, the bees have time to accept their new queen without any disruption.
If you disturb them during this time, they may blame the stress on the new queen and kill her.
If it’s been a week or ten days, your queen has likely been released by the bees who have eaten through the candy plug. They’ve either accepted or rejected her and now it’s time to find out which.
Perform a standard hive inspection (although it doesn’t hurt to go easy on the smoke so as not to stress them too much). Identify the queen herself or at least verify the presence of eggs, so you know she’s there, laying and happy.
If your queen isn’t present, assess the situation with a more experienced beekeeper or order another queen and go through the steps again.